Python
How to deploy Flask, Django, and FastAPI on AwanCerah Web Hosting
Run Python apps on AwanCerah Web Hosting with Setup Python App. The virtualenv and gunicorn are set up for you, then follow the Flask, FastAPI, and Django examples, including migrate, collectstatic, and a superuser.
With Setup Python App, Flask, Django, or FastAPI apps keep running on AwanCerah Web Hosting. The server creates a virtualenv in the app folder, installs gunicorn, and routes your domain or a path to the app with SSL.
We tested all three frameworks in this guide until they loaded over HTTPS, including the Django admin with its static files.
What you need
- Web Hosting on the Kecil plan or higher. Kecil includes 1 app, Sedang 3, and Besar 5. The count is shared across Node.js, Python, and Ruby.
- A domain that points to your hosting with SSL active. See the Web Hosting guide.
- Your Python code, with its packages listed in
requirements.txt.
Create the app
- On the hosting dashboard, open Setup Python App in the Software group.
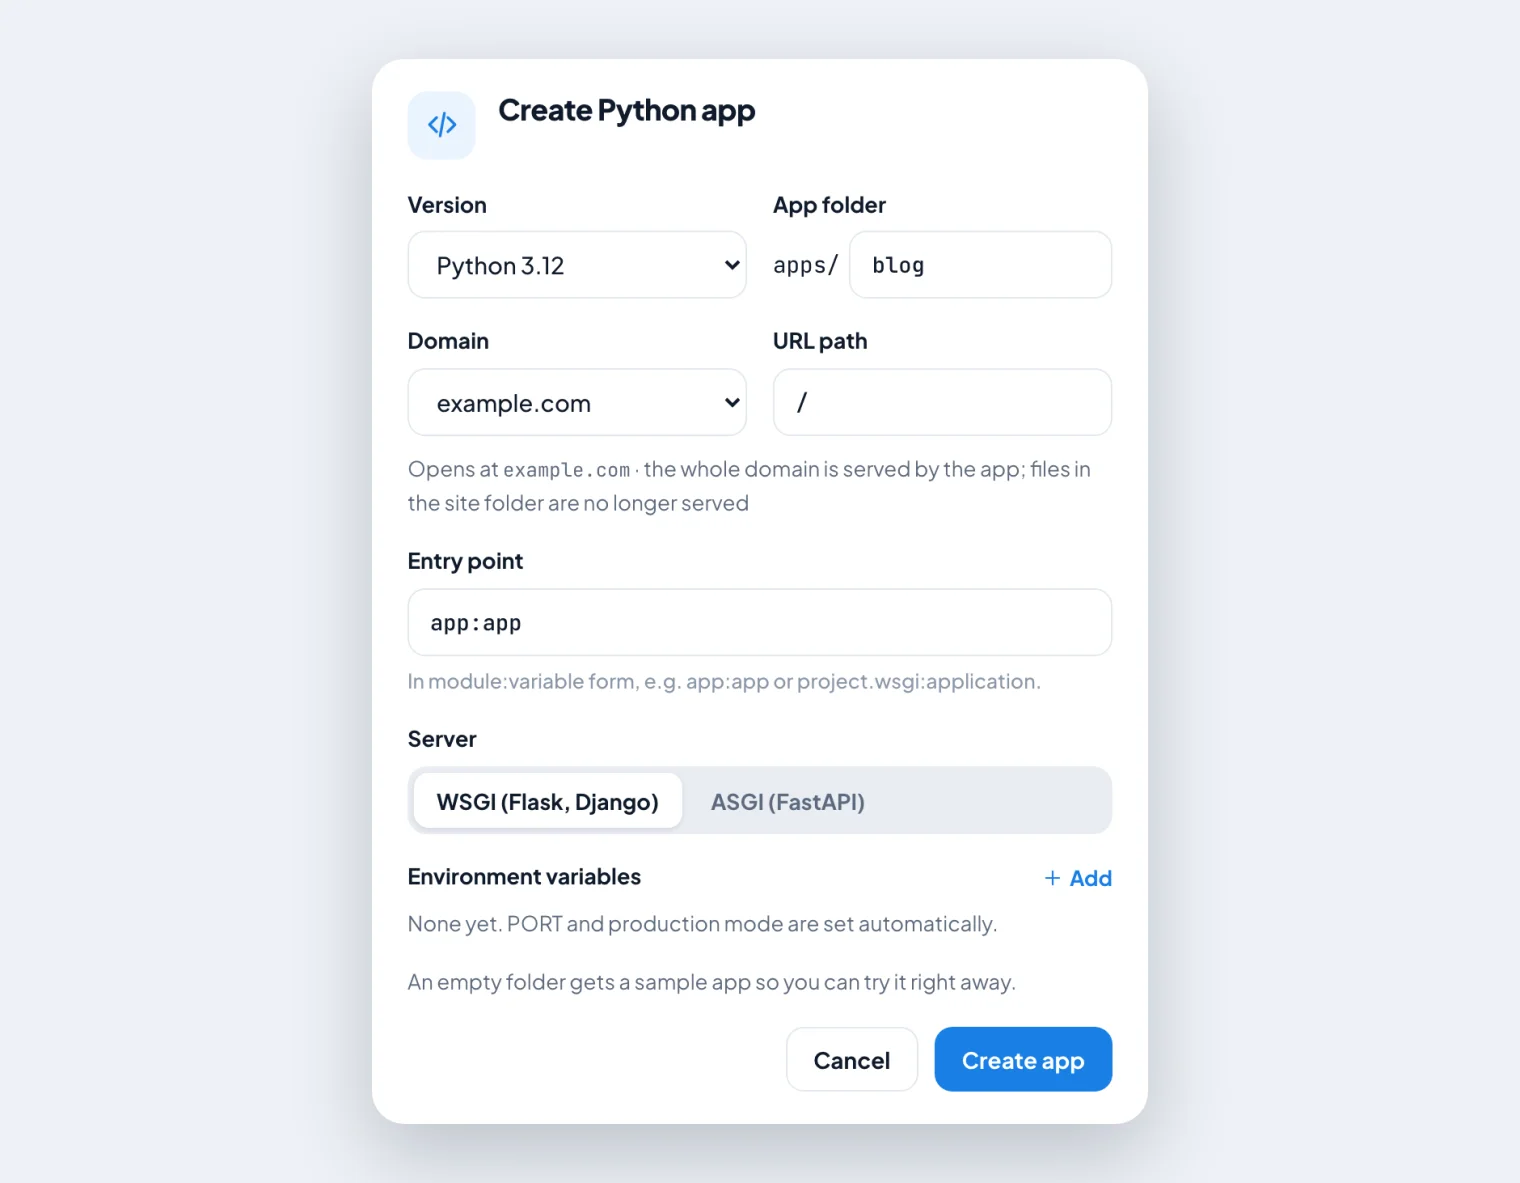
- Click Create app and pick a Python Version.
- Fill in the App folder, for example
blog. The code lives inapps/blog, outsidepublic_html. - Pick a Domain and fill in the URL path. Use
/to serve the whole domain from the app. - Set the Entry point in
module:variableform. For exampleapp:appfor anapp.pyfile with anappvariable, ormysite.wsgi:applicationfor Django. - Pick a Server: WSGI for Flask and Django, ASGI for FastAPI.
- Click Create app.
Creating the app takes about 15 seconds because the server sets up the .venv virtualenv and installs gunicorn, plus uvicorn for ASGI. If the folder is empty, it gets a sample app. Click Open on the app card and you will see "It works!".
Bring in your code
- From Git, before creating the app. Open Terminal in the Advanced group, set the Working folder to
apps, and rungit clone https://github.com/your-account/blog.git blog. Then create the app withblogas the App folder. A folder that already has files does not get the sample app. - Upload from your computer. Zip the project without your local virtualenv folder, such as
venv. In File Manager, open the app folder, upload, and extract. - Start from the sample. Edit the sample files in File Manager.
Do not delete the .venv folder inside the app folder. If it is deleted, click the Edit icon on the app card, then Save to create it again.
Install packages and restart
The Run a command in the app folder box runs pip and python inside the app's virtualenv, with no need to activate it.
- Click the pip install -r requirements.txt button, or type another command and click Run, for example
pip install flask. - Click the Restart icon on the app card.
- Click Open to see the result.
Available commands: python, pip, and git. Commands run without interactive input and stop automatically after 15 minutes.
Flask example
Create the app with the WSGI server and the app:app entry point. Put this in app.py:
from flask import Flask, jsonify

app = Flask(__name__)


@app.route('/')
def index():
    return 'Hello from Flask on AwanCerah!'


@app.route('/api/status')
def status():
    return jsonify(status='ok')
Put this in requirements.txt:
flask
gunicorn
Click pip install -r requirements.txt, then Restart.
FastAPI example
Create the app with the ASGI server and the main:app entry point. Put this in main.py:
import os

from fastapi import FastAPI

app = FastAPI(root_path=os.environ.get('APP_BASE_PATH', ''))


@app.get('/')
def index():
    return {'message': 'Hello from FastAPI on AwanCerah!'}
Run pip install fastapi, then Restart. The interactive API docs are at /docs. The root_path line keeps FastAPI correct when the app runs on a path such as /api.
Django example
If you do not have a Django project yet, create the app with a new App folder and the default entry point, then run these two commands in the command box:
pip install django whitenoise
python -m django startproject mysite .
Then click the Edit icon, change the Entry point to mysite.wsgi:application, and save. For an existing project, use your project folder name instead of mysite.
Adjust mysite/settings.py in File Manager:
import os

SECRET_KEY = os.environ['DJANGO_SECRET_KEY']
DEBUG = os.environ.get('DJANGO_DEBUG') == '1'
ALLOWED_HOSTS = ['yourshop.com', 'www.yourshop.com']
SECURE_PROXY_SSL_HEADER = ('HTTP_X_FORWARDED_PROTO', 'https')

# add WhiteNoise right below SecurityMiddleware
MIDDLEWARE = [
    'django.middleware.security.SecurityMiddleware',
    'whitenoise.middleware.WhiteNoiseMiddleware',
    # ... keep the other middleware as it was
]

STATIC_URL = 'static/'
STATIC_ROOT = BASE_DIR / 'staticfiles'
WhiteNoise serves static files, such as the admin CSS, straight from the app. SECURE_PROXY_SSL_HEADER tells Django that visitors arrive over HTTPS.
Then set up the secret key, database, static files, and an admin account:
- Generate a secret key with
python -c "import secrets; print(secrets.token_urlsafe(50))"and copy the output. - Click the Edit icon on the app card. Under Environment variables, add
DJANGO_SECRET_KEYwith that key. Also addDJANGO_SUPERUSER_USERNAME,DJANGO_SUPERUSER_EMAIL, andDJANGO_SUPERUSER_PASSWORDfor the admin account, then save. - Run
python manage.py migrate. - Run
python manage.py collectstatic --noinput. - Run
python manage.py createsuperuser --noinput. - Open Edit again, remove
DJANGO_SUPERUSER_PASSWORD, and save. The admin password is already stored in the database. - Open
https://yourshop.com/admin/and sign in with that admin account.
By default, Django uses SQLite inside the app folder. For MariaDB, create a database in Databases, run pip install mysqlclient, then set DATABASES with ENGINE django.db.backends.mysql, host localhost, and port 3306.
Django on a path other than /. When the URL path is set, for example /blog, add FORCE_SCRIPT_NAME = os.environ.get('APP_BASE_PATH') or None and change STATIC_URL to (FORCE_SCRIPT_NAME or '') + '/static/'. Without it, the admin CSS links miss the /blog prefix.
Environment variables
Click the Edit icon on the app card and add names and values under Environment variables. After you save, the app restarts. Read the values with os.environ. Environment variables also apply to commands in the command box, so manage.py sees the same values as the app.
Logs and performance
- Click View logs on the app card. The log has
print()output, Python errors, and the gunicorn access log. - An app that crashes is restarted automatically. If it keeps failing, the card shows Not running. Fix the cause using the log, then click Restart.
- The number of gunicorn workers follows the plan's RAM: 2 on Kecil, 3 on Sedang, and 4 on Besar. Requests that run longer than 120 seconds are stopped.
Updating your app
Run git pull, then pip install -r requirements.txt if packages changed. For Django, also run python manage.py migrate and python manage.py collectstatic --noinput. Then click Restart.
Tips
- Apps on a path such as
/apireceive the full path. The path is in theAPP_BASE_PATHenvironment variable, and Flask and Django pick it up through theSCRIPT_NAMEthat the server sets. - The
appsfolder is included in the daily backup, SQLite databases inside it too. - Deleting an app in the console does not delete the files in its folder.
- Need Celery, separate workers, or root access? Use Cloud VPS.
Run your Python app
Setup Python App is available from the Kecil plan at Rp35.000 a month, with SSL, email, and daily backups included.
Still have a question?
Our team can help through live chat, email or WhatsApp.
Chat on WhatsApp support@awancerah.cloud