Web Hosting
Build a site with AwanCerah Web Hosting: domain, DNS, SSL, WordPress, and email
Buy a domain at AwanCerah, use managed DNS, create Web Hosting, install WordPress or upload your own site with automatic SSL, then create email on your domain. All from one console.
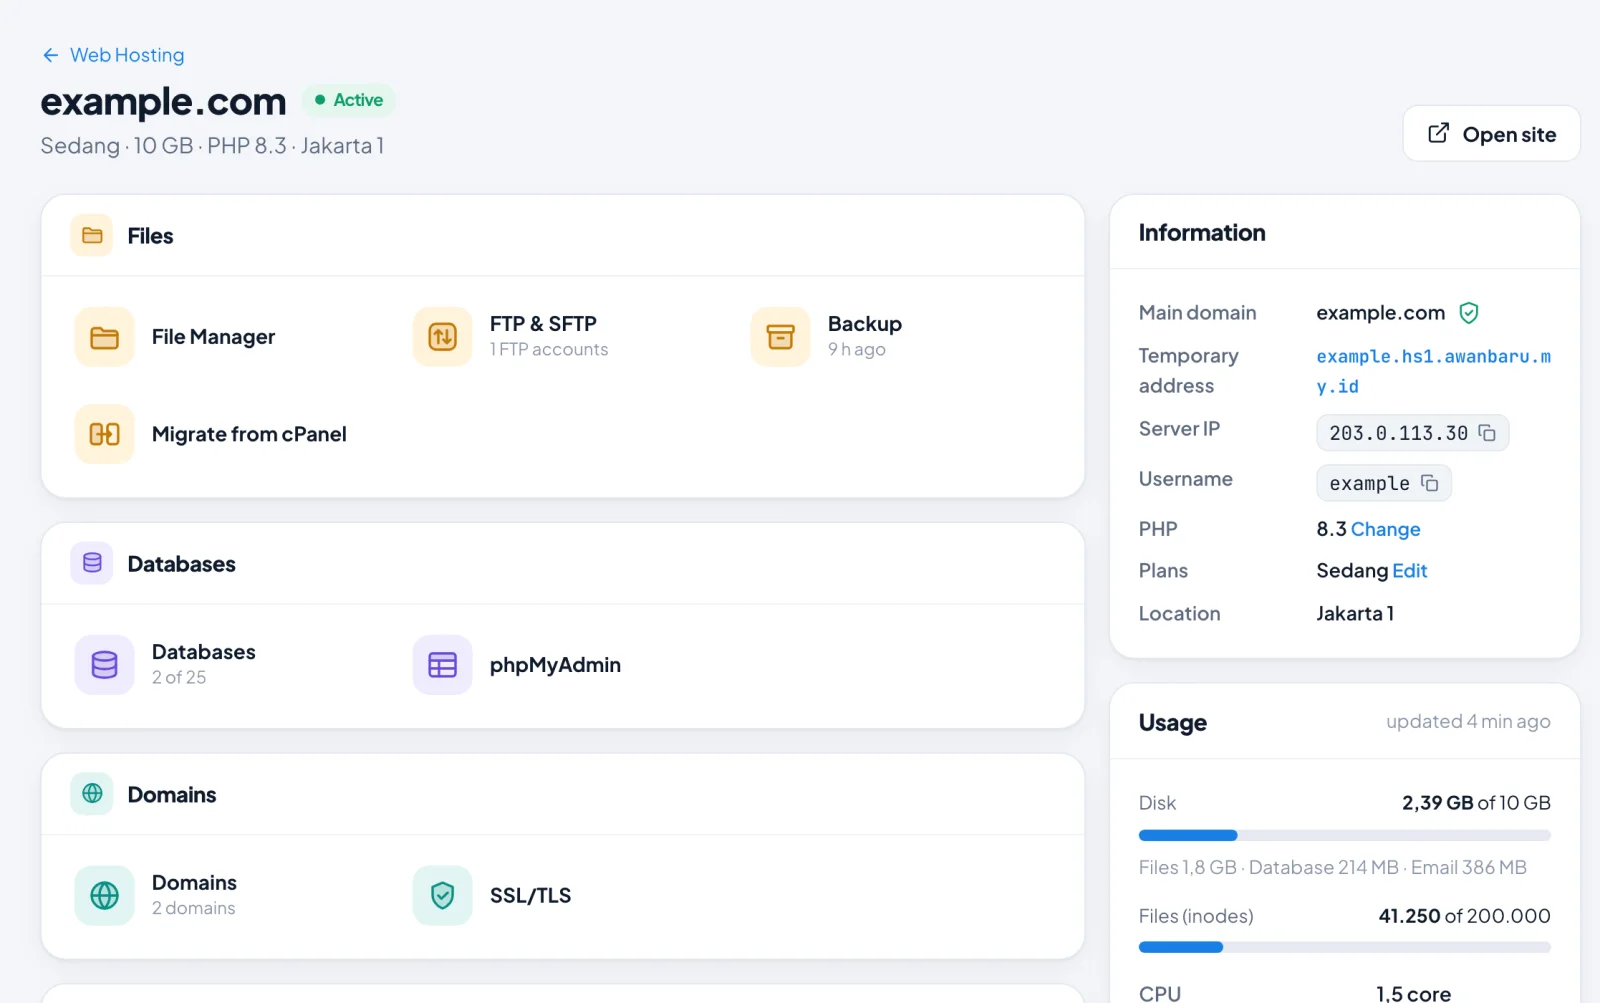
AwanCerah Web Hosting is managed from the same console as your VPS and domains. Its dashboard groups tools the way you know from other hosting panels: Files, Databases, Domains, Email, Software, and Advanced. Each tool opens on its own page.
This guide starts from scratch: buying a domain, using AwanCerah DNS, creating hosting, pointing the domain, installing WordPress or uploading your own site, then creating email on your domain. We ran this whole flow until a WordPress site loaded over HTTPS. Once DNS pointed to the hosting, SSL was active within seconds.
Buy a domain
- In the console, open Domain and then Register domain.
- Type a domain name and click search. Type just the name to see every extension, for example .com from Rp257.000 and .id from Rp245.000 a year. The price shown is the exact price, including the renewal price.
- Click Select and choose the Registration period.
- Under Registrant details, add details that match a real identity, as an individual or an organization. Incorrect details on .id domains can get the domain suspended by the registry.
- Leave Nameserver empty. The domain then uses AwanCerah DNS, and its DNS zone is created in your account right away.
- Domains are paid from your paid balance, top-up bonuses do not apply. Auto-renew is on from the start. Click Register domain and accept the Terms of Service.
Domains are usually active within minutes. .co.id, .or.id, .ac.id, and .sch.id domains need documents. Upload them on the domain page, and the domain is registered once the registry verifies them.
Already have a domain elsewhere? Open DNS, click Add zone, then change the domain's nameservers where you bought it to dns1.awancerah.cloud and dns2.awancerah.cloud. The next steps are the same.
Create Web Hosting
- Open Web Hosting and click Create hosting.
- Enter your domain as the Main domain, for example
yourshop.com. The www address is included automatically. - Pick a plan. You can change it later.
| Plan | Disk | Domains | Databases | Price |
|---|---|---|---|---|
| Mikro | 1 GB | 1 | 2 | Rp15.000/month |
| Kecil | 5 GB | 3 | 10 | Rp35.000/month |
| Sedang | 10 GB | 10 | 25 | Rp59.000/month |
| Besar | 20 GB | 25 | 50 | Rp99.000/month |
- Choose a PHP version. The default is PHP 8.3, and you can change it at any time.
- Choose a Payment option: Hourly, Monthly for a lower price, or Yearly with 2 months free.
- Click Create hosting and accept the Terms of Service.
Every plan includes email. Email accounts and Node.js, Python, and Ruby apps per plan are listed on the Web Hosting page.
The hosting is ready within seconds and you land on the hosting dashboard. You can try the site right away at a temporary address such as yourshop.hs1.awanbaru.my.id, which already has HTTPS, while the domain is pointed. The temporary address and the server IP are in the Information card.
Point the domain to your hosting
- On the hosting dashboard, open Domains. The SSL/TLS tile opens the same page.
- Because the domain uses AwanCerah DNS, the DNS zone column shows a Point automatically button. Click it and confirm with Point. DNS records for the domain and www are created automatically.
- The DNS column shows a green check mark, and a Let's Encrypt certificate is installed automatically. When it is done, the SSL column shows a green shield.
For a newly registered domain, the zone in the DNS menu can show Waiting for nameservers for a few minutes. SSL is installed once the zone is Active, with no extra steps. The Check button on the domain row checks again right away.
If your domain's DNS is managed elsewhere, click Not pointed yet in the DNS column. The console shows the records to create. Copy the type, name, and value to your DNS provider. Domains behind the Cloudflare proxy are supported too.
Install WordPress after SSL is active. WordPress saves the site address during installation. If it is installed before SSL is active, the address is saved with http.
Install WordPress
- In the Software group, open App Installer and choose WordPress in the Install an app card.
- Pick your main domain. Leave the folder empty to install at the domain root.
- Fill in the Site title, Admin email, and Admin username.
- A random admin password is filled in. Copy and save it now, because it is not shown again.
- Click Install WordPress. It usually finishes within 1 to 2 minutes.
The database is created automatically, and WordPress is installed in its latest version in Indonesian. You can switch the site language later in WordPress settings. Sign in to the dashboard at https://yourshop.com/wp-admin/.
Upload your own site
Your site is served from the public_html folder.
- File Manager in the Files group: upload up to 50 MB per file, extract .zip files, edit files in the browser, and set permissions with Read, Write, and Execute check boxes.
- FTP & SFTP: first set a New SFTP password, then sign in with the host, port, and username shown, using FileZilla, WinSCP, or Cyberduck. Use SFTP for files above 50 MB.
- Laravel or Symfony: in Domains, click Edit in the Folder column and point it to
public_html/public.composerandphp artisancommands can be run from Terminal in the Advanced group.
Databases and phpMyAdmin
- Open Databases and create a New database. Its name automatically starts with your hosting username.
- Create a New user, save its password, and tick the databases it may access.
- In your app, use host
localhostand port3306.
The phpMyAdmin tile on the dashboard opens phpMyAdmin in a new tab and signs you in without a password.
Create email on your domain
- Open Email Accounts. If email for your domain is not enabled yet, click Enable email.
- In the DNS records section, click Add automatically if the domain uses AwanCerah DNS. The MX, SPF, DKIM, and DMARC records are added at once. If your DNS is managed elsewhere, copy the records shown to your DNS provider.
- Click Create email account, fill in the Email address and a password, then click Create email account. Save the password, because it is not shown again.
- Click Webmail on the account row to open Webmail without typing a password.
The server and the IMAP, POP3, and SMTP ports for Outlook, Thunderbird, Gmail, or iPhone are listed under Email client settings. The username is the full email address.
- Forwarders forward email, for example sales@ to several staff members.
- Autoresponders: press Autoresponder on the account row to open the Out of Office settings in Webmail.
- Default Address sets where email to unknown addresses goes. When it is off, that email is rejected.
All email accounts share the plan's disk quota with files and databases. Usage is shown in the Usage card on the dashboard.
Manage your domain's DNS
All of your domain's records live in the DNS menu. Open your domain's zone and click Add record for A, AAAA, CNAME, MX, TXT, SRV, CAA, or NS. For example, a TXT record to verify Google Search Console.
Backups and tips
- Automatic backups run every day at around 02:00 WIB and are kept for 7 days in another location. Open Backup and click Back up now before big changes. To restore a backup, contact support with the date.
- Email from WordPress, such as password resets and contact forms, is sent through PHP mail() with an hourly limit based on your plan. For more reliable delivery, install an SMTP plugin and use one of your hosting email accounts.
- Switch PHP versions in PHP Version, and set values such as
memory_limitorupload_max_filesizein the PHP INI Editor. Scheduled jobs are in Cron Jobs, at most every 5 minutes. - PHP errors and site visits are in Errors and Raw Access in the Metrics group.
- Need more space, domains, or email accounts? Upgrade your plan in Plan & Settings.
Want to run something other than PHP? See the Node.js, Python, and Ruby on Rails guides.
Ready to build your site?
Web Hosting starts at Rp15.000 a month with automatic SSL, email on your own domain, phpMyAdmin, SFTP, and daily backups.
Still have a question?
Our team can help through live chat, email or WhatsApp.
Chat on WhatsApp support@awancerah.cloud